Brow Lamination: How Long Does It Last, Aftercare, Before and After
It’s safe to say that Brow Lamination is taking over the game, with fluffy brows being the most on trend brow style right now - and it's easy to see why… the results are insane! But what actually is it, and how does it work? Keep reading to find out.
Contents:
1. What is brow lamination?
2. What does the treatment involve?
3. Is a patch test required?
4. Can’t I just do it myself at home?
5. How long do the results last?
6. Brow lamination aftercare
7. Is brow henna or brow lamination better?
8. The takeaways
1. What is brow lamination?
This innovative beauty treatment originated in Russia and quickly spread across the rest of the world, and it’s now arguably one of the most popular brow treatments on the market. Lamination is instantly recognisable by the sleek, shiney, brushed up hairs that have completely taken over social media. It’s essentially a longer lasting version of soap brows!
The treatment itself is a process that involves altering the brow hairs structure in order to make the hairs easier to manipulate, and allows us to create a totally new brow shape. The keratin bonds within the brow hairs are broken down, the hairs and then lifted and brushed into their new position before being fixed with a cream that repairs these bonds and sets the brows into shape. Where natural brow hairs may lay flat, brow lamination allows us to lift the hairs and create a fuller looking brow - much like you would with regular brow gel or soap, except the lamination won't wash out!
It can be particularly useful for those with coarse, unruly brows as the lamination process will make the brows much easier to manipulate. If it's the fuller brows you want but you’re not ready for Permanent Makeup, brow lamination is the perfect alternative.
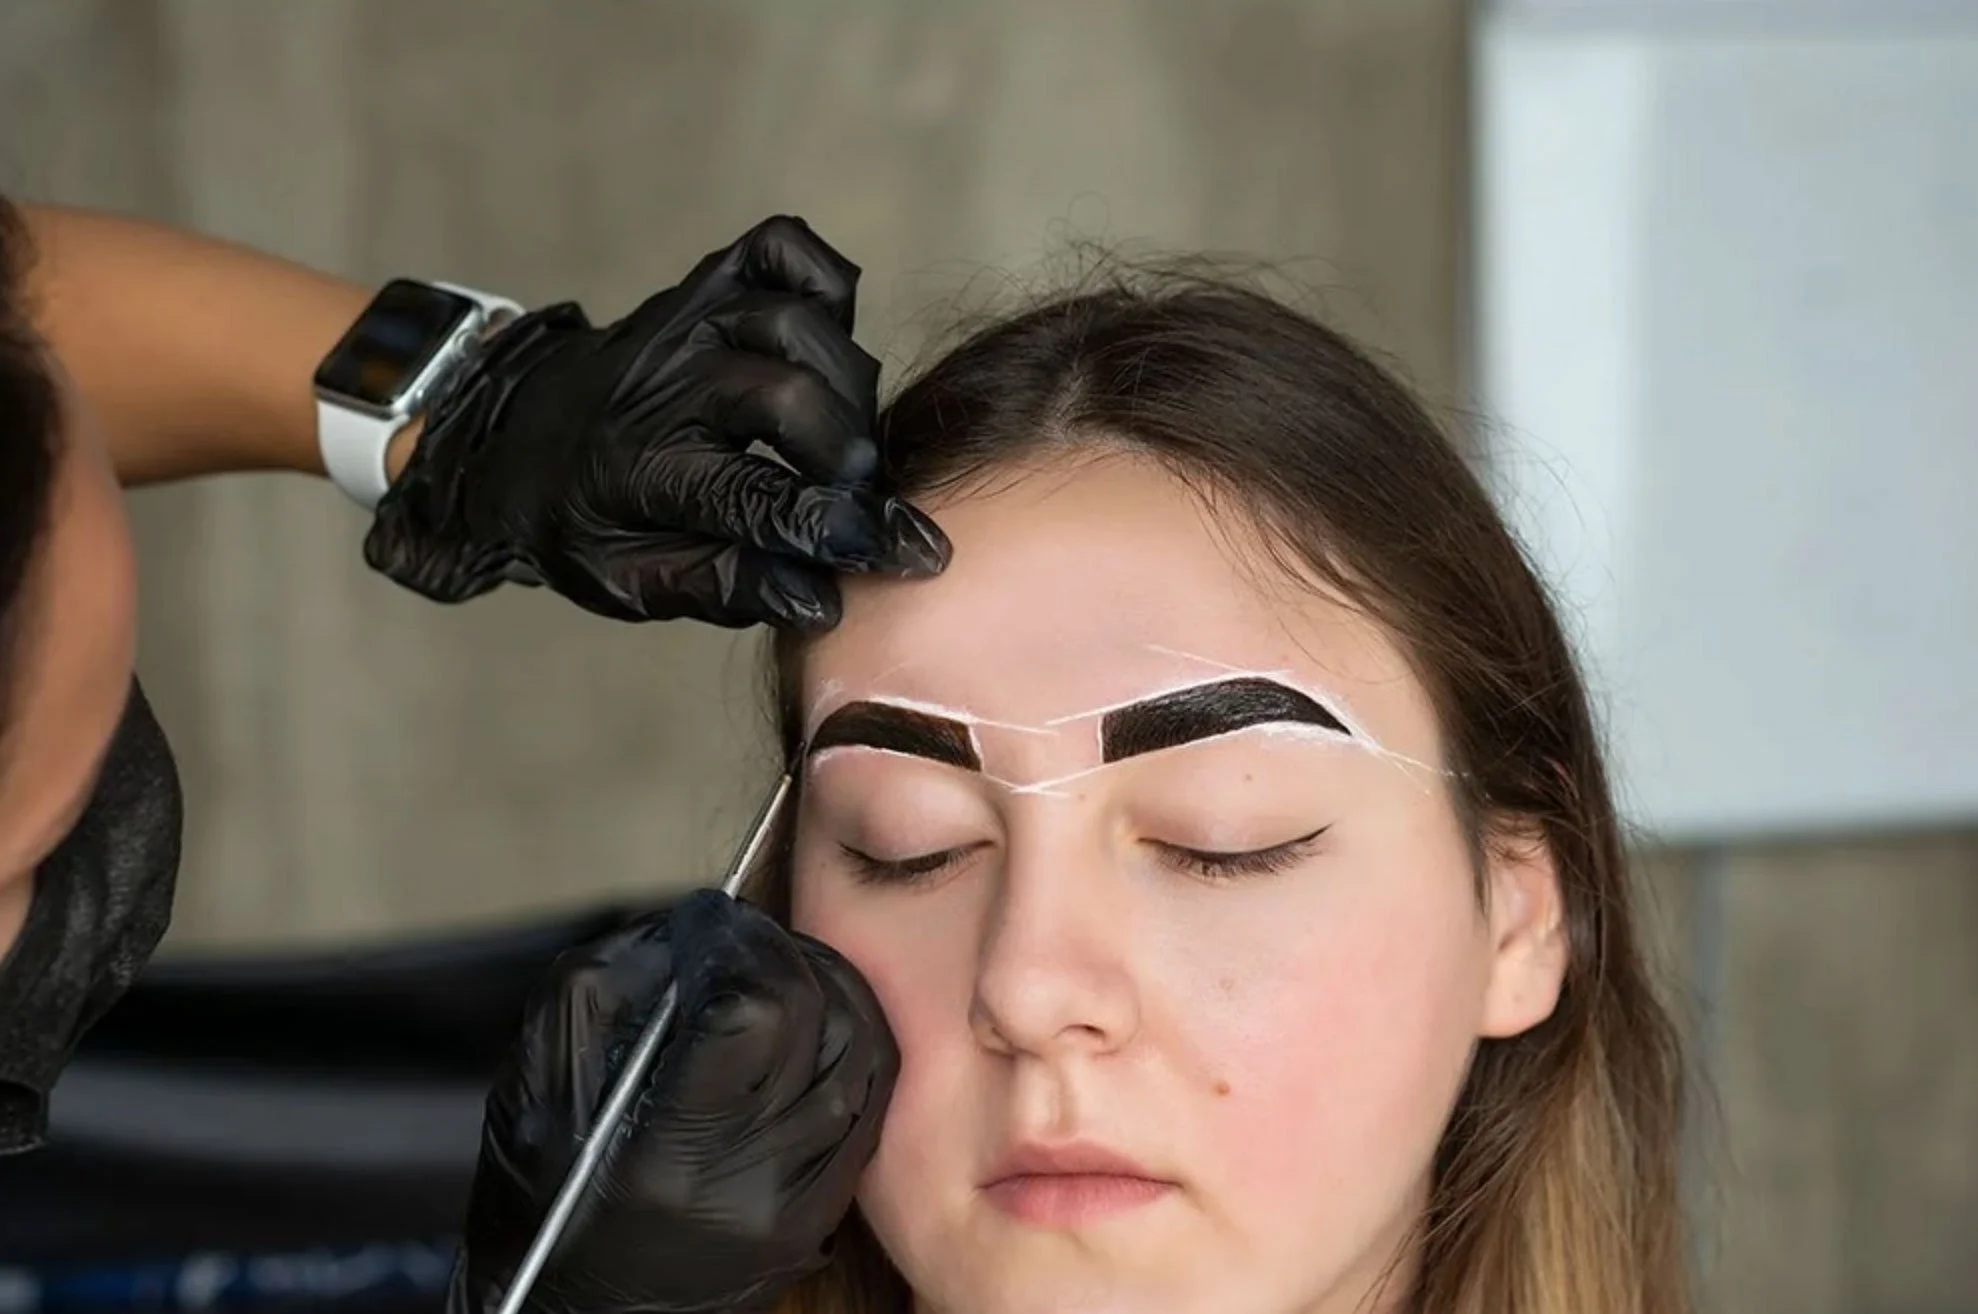
2. What does the treatment involve?
Consultation - First we will discuss your brow goals to determine the results you want to achieve
Step one - After cleansing and brushing through the brows Maisie will fix and stubborn hairs into place
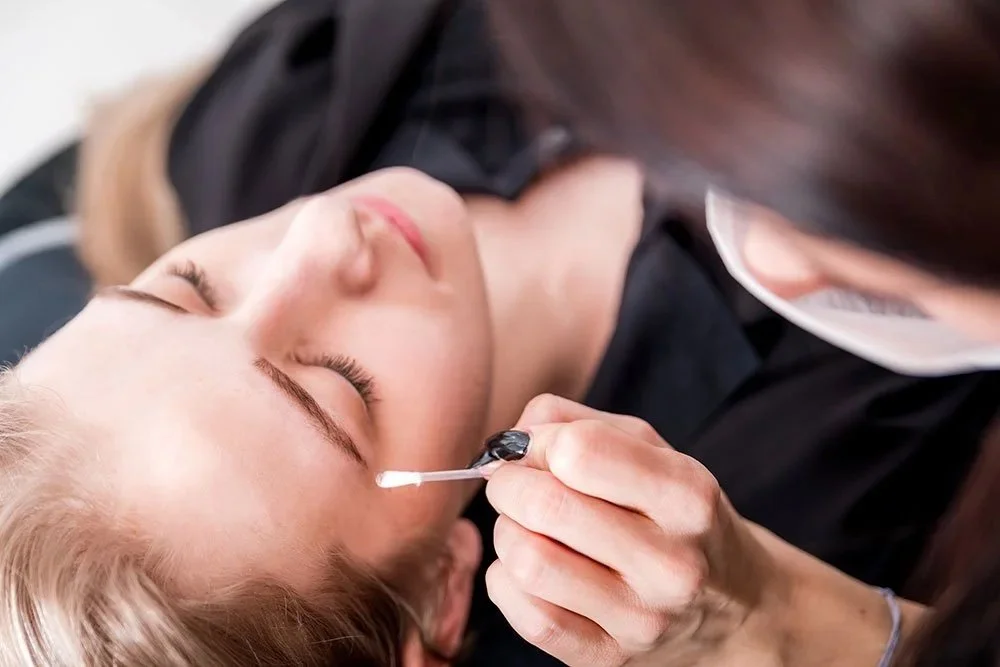
Step two - Next the Brow Lift solution is applied. This cream breaks down the bonds within the hairs which allows us to manipulate them into shape. This cream is left on for 5-8 minutes depending on the clients hair
Step three - Brow Lift is removed from the brows, and Brow Fix is applied. This cream helps to reform the bonds within the hair and set them into position. This cream is left on for 5-8 minutes depending on the clients hair
Step four - Optional brow tint* Precision tinting will help to define the brows and will enhance the results of your brow lamination
Step five - Excess hair is removed and our Brow Nourishing serum is applied to the brows whilst brushing them the desired new shape. The serum helps to keep the brow hairs hydrated and healthy while the lamination effect sets in. At this stage the brows can be kept sleek and swept over, or super fluffy and brushed up.
*Tint is optional as we understand that some clients do prefer the more natural brow lamination look, however we do advise you that the lamination process can lighten the hairs slightly. This can be discussed at your appointment.
The process itself usually takes around 45 minutes.
Does brow lamination hurt?
Whilst it is a chemical process, the treatment isn't painful. Some with sensitive skin may feel a slight tingle whilst the brows are processing but it should not be painful - if it is you may have an allergy.
3. Is a patch test required?
Patch tests are required for both the lamination solutions and the brow tints. This must be carried out at least 48 hours before your appointment.
Although brow lamination is a relatively safe and risk free procedure, there is a chance that you may be allergic to the products. An allergic reaction could look like this:
Red, irritated skin
Swelling and inflammation of the brows and/or eyes
Itchining, flaking, bumps or weeping skin
Allergic reactions vary in severity, but most are mild. If you do have a reaction you should contact your GP or pharmacist for advice. You can take antihistamines, apply a cold compress to reduce swelling and avoid touching the affected area.
4. Can’t I just do it myself at home?
As brow lamination involves chemicals we really advise against doing it at home. Unfortunately not everything we buy off the interest is as safe as it claims to be, and if the treatment is not performed correctly you're at serious risk of an allergic reaction or over-processing which would damage your brow hairs. Over processed hair looks curly and often feels dry or brittle - in the worst case scenario the hairs can break off. And in terms of the final look, there’s no arguing, you really can’t beat an in-salon treatment.
5. How long do the results last?
This can vary depending on your natural hair and how well you care for your brows, but in ideal conditions brow lamination can last up to 10 weeks. It is important to wait until the lift has completely dropped from your brows before booking in for your next appointment as we dont want to risk over processing the hairs.
6. Brow lamination aftercare
Aftercare is super important with brow lamination, and the number one thing to ensure best results is to keep your brows dry for 48 hours after your appointment. If you get water on your brows before they have fully set into position the lift will drop and your brows will just return to their normal state.
After the 48 hours have passed you are free to get your brows wet, in fact we actually recommend you wet your brows before brushing them into shape as this will help them stay in position once they're dry!
Now lamination itself is actually a chemical process, and as such it's vital that we do everything we can to keep those brow hairs in tip top condition post lami. At your appointment we will provide you with some of the Brow Nourishing serum to take home with you - please apply this at least once a day to your brows. If you run out, castor oil is a great alternative. We also recommend conditioning your brows with some regular hair conditioner a few times a week. You can do this when you're washing your hair in the shower, just apply a small amount of conditioner to each brow and rinse off after 2-3 minutes.
Note: Brow lamination is a low maintenance not no maintenance treatment. To keep your brows looking their best you should brush them into your desired shape each day. Use a spoolie and your brow care product of choice to shape and maintain your brows.
7. Is brow henna or brow lamination better?
One isn’t better than the other, it really depends on the results you want to achieve - henna is great for a defined, ombre look and lami is perfect for the fluffy, brushed up brows.
They can actually be combined so you can get the best of both worlds, but it's imperative they ARE NOT done at the same appointment.
If you wanted to do this I’d recommend having your brow lamination first, then after 4 weeks your brows will be ready for some maintenance to refresh the colour and remove excess hair regrowth. At this point you could opt for regular tint, like you'd have had at your initial lami appointment, or you could go for henna (a longer lasting alternative). This would then last you another 4-6 weeks until your next lami appointment.
8. The takeaways
Brow lamination will give you fuller looking, fluffy brows. It can help tame unruly brow hairs, and will help lift hairs to achieve a better shape. It’s best suited to people who like the soap brow, or brushed up brow look, but for those who love a sharped, defined brow henna would be a better option. The results are fairly long lasting, but as its a chemical treatment aftercare is very important to ensure your brow hairs stay healthy and hydrated.
Share this post